Showing posts with label Moderns. Show all posts

Saturday, 5 October 2013

Panjwayi Campaign: ANP Rescue

Last night at the Trumpeter Club meeting I hosted a session of my Force On Force campaign focussing on the Canadian fight against a revitalized Taliban in the Panjwayi region of Kandahar Province, Afghanistan, in the summer of 2006.
This is actually the second game of the campaign that I have run, but we had a long break since the last game and the paper with the campaign results has disappeared, so we essentially started fresh again with this game.

Background


As the “fighting season” of 2006 begins in Kandahar province, Afghanistan, a storm looms on the horizon. Elements of the Taliban leadership, exiled to Pakistan, have developed an audacious plan.


Having studied the Coalition nations with a critical eye for the past several years, Mullah Dadullah Akhund has spotted a lever with which he might be able to bend - and maybe break - the fragile alliance. A new roto of Canadian soldiers is due to arrive in the spring, just as the political landscape in Canada shows an increased unwillingness to send their young men and women to die or be maimed in foreign wars. A bold, symbolic strike into the centre of the Coalition’s territory, even if it is immediately crushed and results in hundreds of dead jihadists, could be enough to break Canadian political support for the Coalition. .

With visions of a bloody Taliban flag raised above the provincial governor’s compound in Kandahar City, the “One-Legged Mullah” orders dozens of Taliban cells to begin infiltrating across the border into Afghanistan. The only thing preventing their push to Kandahar are the companies of Task Force Orion in the rural Panjwayi district.

The campaign is based loosely on the events in Contact Charlie by Chris Wattie, the best book I have found for understanding Canadian operations in Afghanistan at this level.

ANP Rescue


One of the first targets of the Taliban flooding into the Panjwayi district is the local Afghan National Police. The ANP are a force of wildly mixed ability and questionable loyalty, but support and training of local forces is a key part of the ISAF's reconstruction effort. A dozen or more ANP have been killed in ambushes and attacks in the last week alone. A runner has just arrived by motorcycle from a police station on Highway One near your FOB, with news that the ANP there are under heavy Taliban attack. The Canadians of 3-1 Bravo are once again at the sharp end, tasked with relieving the station and rescuing their dubious allies.

In rules terms, the Canadians start at one end of the board and have to "secure the area" around the ANP station by neutralizing as many Taliban Hot Spots as they can. Each Hot Spot is worth 5 VP to either the Canadians or the Taliban, depending on whether it has been neutralized or if it's still active at the end of the game, and the other standard OEF victory point conditions also apply. There wasn't a turn limit, we just played until the time limit for the night. 

Canadians started with two LAV-mounted infantry sections, plus a sniper team they bought with their Operational Momentum points. The Taliban starting forces and reinforcements were generated randomly via tables I created for the campaign.

Battle Report

Before I get into the blow-by-blow of the fight, I have to mention the photos that Martin, one of the participants, took of the battle. They show the action a lot better than my own, so check them out at his Flickr page. 


1 Section arrives along Highway 1 en route to the ANP station

Taliban cells materialize in the village.


The beleaguered ANP take cover in their station from Taliban fire.


Blackhawk's-eye view of the village, with the Canadian LAVs approaching down the highway towards the hidden Taliban.


The poor ANP morale begins to show as heavy Tailban fire from a nearby compound forces the policemen out of their positions.


Some of the ANP are able to rally and return to their firing positions, but not without taking some casualties.


More Taliban arrive in the village and begin to move out towards the Highway to intercept the cavalry.


Canadian LAVs push down the highway to engage the Taliban attackers. A cell of Taliban is caught out in the open of the small marketplace and pays a heavy price.


Canadian soldiers dismount from the LAV and press the attack. The rearmost LAV has suffered some damage from Taliban mortar shells, reducing its mobility. 


The Taliban in the building near the ANP station have faded away to focus their efforts elsewhere, and the ANP have regrouped within the police station.


A Taliban cell comes out of the village to approach the Canadians from the cover of the marijuana fields.


More Canadians exit their LAVs to engage the Taliban in house-to-house fighting.


The Taliban muster in a courtyard prior to attacking the Canadians on the highway.


Nearby, a team of Canadians catches a group of Taliban in a courtyard and wipes them out.

Post-Game

By the end of the game , the Canadians had wiped out dozens of Taliban fighters and had the remainder on the ropes. Unfortunately, they had somewhat lost sight of the mission objectives while fighting the Taliban soldiers. The Canadians and ANP had come out of the situation with just a few wounded, but the area remained a nest of Taliban activity. With all the Hot Spots still under Taliban control at the end of the game, the Taliban won a decisive victory despite their casualties.

In the campaign post-game sequence, one of the teams in 1 Section gained upgraded defence, and one of the teams in 2 Section suffered combat fatigue, resulting in degraded morale for the next game. The insurgency received no upgrade.

Thursday, 1 August 2013

Battle Report: Busy Day In Kandahar

I had a game of Force On Force with a friend today. We played Busy Day In Kandahar, which is a slightly modified version of a scenario from the Operation: Enduring Freedom sourcebook (modified to turn the USMC soldiers into Canadian Forces troops, plus some victory condition tweaks).

The game lasted about 4.5 hours and it was a blast. Every time I play FoF I like it more. Between the way the battle played out and the random events thrown in by the Fog Of War cards, a proper little narrative develops - events not directly related to the battle situation begin to snowball and turn into full-fledged side-stories.

The scenario pits a Canadian Forces (CF) platoon, with support, against a whole bunch of Taliban. The CF have divide their attentions among three objectives: first, in the NW quadrant, they are tasked with recovering a wounded soldier and extracting him across the board to the Helicopter Landing Zone in the SW. Second, in the NE, they have to provide protection to an EOD team disarming an IED under the guns of the Taliban. Third, they have to clear the HLZ of all Taliban in line of sight to provide a safe area for the helo to land. Together, it's a pretty tough list of objectives for the Canadians to achieve.

The Taliban, as usual, earn victory points for killing / wounding / capturing CF soldiers. The Taliban are terrible troops, but there's a conveyor belt of reinforcements arriving all the time, and their victory conditions make no mention of losing troops, so they can sacrifice whole squads in the hopes of doing a bit of damage to the Canadians.

On to the photos:


Initial deployments, viewed from the SW. CF section 1 stacks up in an alley with the EOD team up ahead, waiting for the infantry to clear the area. The LMG takes an overwatch position on the roof to their left, and the CF sniper is badly placed at the start of the fight, out of picture to the south. To the NW, Canadians deploy in a compound ahead of their attempt to retrieve their injured comrade (that little black dot visible at the very top of frame).

Looking at the west side from the north. In the clearing between the compounds you can see the injured CF soldier, looked over by a couple of Taliban cells. The Canadians suffered a serious casualty in the firefight with the Taliban, but wisely called in a smoke mission from the off-board artillery to mask their recovery of the soldier, and were able to get him to safety .
Meanwhile, at the top of frame, a cluster of civilians emerged from the building where the Taliban were taking cover and approached the Canadian soldiers, begging for help with a child who had been wounded in the fighting. The CF were able to render assistance, but the presence of the civilians complicated matters a great deal.
Canadians set up to cover the EOD team on the east side. Farther up the street, the EOD robot examines the IED while the Taliban gets ready for action. West of the IED you can see a Taliban sniper team flipped on its back, having been PID'ed and wiped out before getting off a shot.


After a few turns the battle has begun to take shape. A Taliban cell at hotspot 3 hunkers down to cover the HLZ - this hotspot was key, as the Taliban kept funnelling troops into it as they got mowed down by Canadian sniper and LMG fire so that they could deny the HLZ to the Canadians. The Taliban had bigger and better plans for that area, but that building was a killing zone so they couldn't form up for a counterattack.
Meanwhile, to the north, The Canadians in the compound engage in fire coming from the compound in the north and the smallish building to the west. The civilians in the courtyard of the small building make it very hard for the Canadians to bring fire to bear on that building, which will have a huge influence on the outcome of the fight.

The sniper and LMG on the rooftops that caused the Taliban so much trouble in the south. To the northeast, the Taliban had been pretty much wiped out entirely and the IED had been disarmed, so the Canadians were beginning to fall back to the HLZ.


Here we see a bold play by the Taliban that eventually cost the Canadians the game. The 2 Section command element (leader and medic) had approached the civilian base to try to disperse it, but fell casualty to Taliban fire. Before the Canadians could get another team in place to check on them, the Taliban darted out of the building and took them captive. The Canadians were reluctant to shoot into a group that contained their own people (and was interspersed with civilians), and couldn't quite catch the Taliban to launch an assault, so the CF command team was still captive at the end of the game.

The Canadian medevac helo waits above the battlespace for the call to land and pick up casualties, but the call never came. A sandstorm had blown up, restricting movement, and it became impossible for the CF to extract to the HLZ in the time they had available.
The EOD team, with the IED disarmed and no Taliban remaining in sight, hunker down and wait for the resolution of the fight elsewhere.

Canadians scramble to assist the fight in the west, but with the sandstorm forcing them to move slowly, they can't get there in time.

A single Taliban sniper covers the HLZ, but it's enough to render it too dangerous for the helo to land.

Final disposition of the fight in the west. The Taliban disappears into the field with their captive soldiers, while the CF clears the building and gets ready to give chase. It's too late, though, as the Taliban have just enough of a head start to make good their escape.


The game was great fun and the result was very close. The Taliban won by a literal inch, as the escaping cell with its captives was just that far ahead and, the way the turn cycle worked, they couldn't be caught. With some more turns in the game they would have been dealt with, as there was really nowhere for them to go and the other CF section was on its way to cut them off, but we reached the end point before that could happen.

Force On Force (the scenarios in the OEF sourcebook, anyway) give the Coalition forces a tough job. The Coalition victory points are all objective-based, so they have to control the battlespace and stay focussed on the mission; the Taliban, on the other hand, get victory points for injuring, killing, or (especially) capturing Coalition soldiers. The Canadians can (and often do, like in this game) take out dozens of Taliban troops, but they gain no direct advantage from causing casualties. The Taliban have pretty terrible troops and they have a hard time getting casualties on the Canadians, especially when the Canadians are in hard cover, but they just need to keep throwing out firepower in the hopes of causing damage. Add in all the counter-insurgency restrictions on the Coalition actions, and the Canadian game becomes a very difficult balancing act. The Canadians performed extremely well in this scenario, and just lost by that crucial inch that made the difference between recovering their captured soldiers or losing them to the Taliban.

Saturday, 13 October 2012

Market Day II

I had to scramble a bit this week to finish up the market stalls I built for my Afghanistan games. I'm pretty happy with the result.


The wares for sale are various seeds and grains bought from the bulk section of the supermarket, plus a sampling of different seeds given to me by Bryan. The rug merchant is selling little paper printouts of various Afghan rugs I found online. The bits of machinery are extra bits and bobs from the 1/35th scale plastic Tiger tank I'm building.

Force On Force: Bomber In The Bazaar

I finally got my moderns onto the table and into action last night. I've been working on my Canadians and Afghans, and the terrain for them to fight over, for months, so it was very satisfying to have a war with them at last.

We played the Bomber In The Bazaar scenario from the Operation Enduring Freedom sourcebook for Force On Force. This was only my second game of FoF but I'm really into these rules. The game lasted the full six turns and was tense the whole way through, with hard decisions required for both sides every turn. By the end of the game there were a lot of dead and demoralized Taliban, but they had managed to wreak enough havoc that they won on points. The suicide bomber managed to make his way across the whole board and ran right up between two Canadian units and a group of civilians, but couldn't get his vest to detonate, and was subsequently gunned down.

The Canadians had a hard go of it, feeling very hampered by the rules of engagement. There were a lot of civilians stumbling around getting in the way, and the Canadian sniper team in particular had a hard time making the PID checks required to engage the Taliban. One of the few times they risked shots near the civilian mobs, they accidentally shot a civilian, which did not help either their mob dispersal checks or their victory points.

I only got a few photos before the game started, and then I was too busy trying to send the infidels to hell to remember to take photos.

A group of Taliban looks over the bazaar, with a few Canadian Forces soldiers and their terps visible beyond.

The Canadians form up in preparation for their COIN patrol into the bazaar. 

A slightly blurry view of the Canadian sniper overwatch team looking down on the bazaar.

Gamecraft Afghan buildings in progress

I have finally completed my full set of Gamecraft buildings for my Afghanistan table. I had to do a lot of experimenting with techniques and materials before I found a solution I liked. I think the result looks good, but each building required a fair bit of messy work, so I'm glad I'm done. The stucco gel is not much fun to work with - it's really tacky, and the sand gets everywhere.

My process was as follows:

1. First coat of Liquitex Stucco textured acrylic gel - this doesn't have to be clean or even or nice, it's just there to provide a gritty surface for the following coat.

2. Clean out the corners, windows and doors of excess globs of paint.

3. Let it dry thoroughly.

4. Second coat of Liquitex, with a focus on applying enough to get all the corners a bit rounded. The walls themselves look better if the gel is applied a bit unevenly.

5. With a very wet brush, I smoothed out the walls and roofs. I don't try to get them perfectly flat, just smoothing down the parts that stick up, so it looks like a mud wall.

6. Clean out the corners and apertures again.

7. Let it dry thoroughly again.

8. Paint - I used cheap craft acrylics, watered down and with a bit of Pledge floor polish added. The stucco gel I used is white, and I only did one coat of paint, so the buildings came out very light.

9. Wash - I used a thin black / brown wash over the whole building, which I then blotted with crumpled up paper towel, which gave a slightly mottled look to the walls, while leaving the corners and recesses fairly dark.

With several different stages to do, I had a bit of an assembly line going with 3-5 buildings at each stage of the process.

The mosque was a special case, because it came with a dome. The dome was a coarse foam half-sphere, so I gave it several coats of plaster, smoothed with a wet finger, to give it an even enough surface for painting.

In-progress photos:

First coat applied.

First coat applied.

Second coat applied.

Second coat after smoothing.

For photos of the completed, painted buildings, see my next post!

Monday, 24 September 2012

Market Day

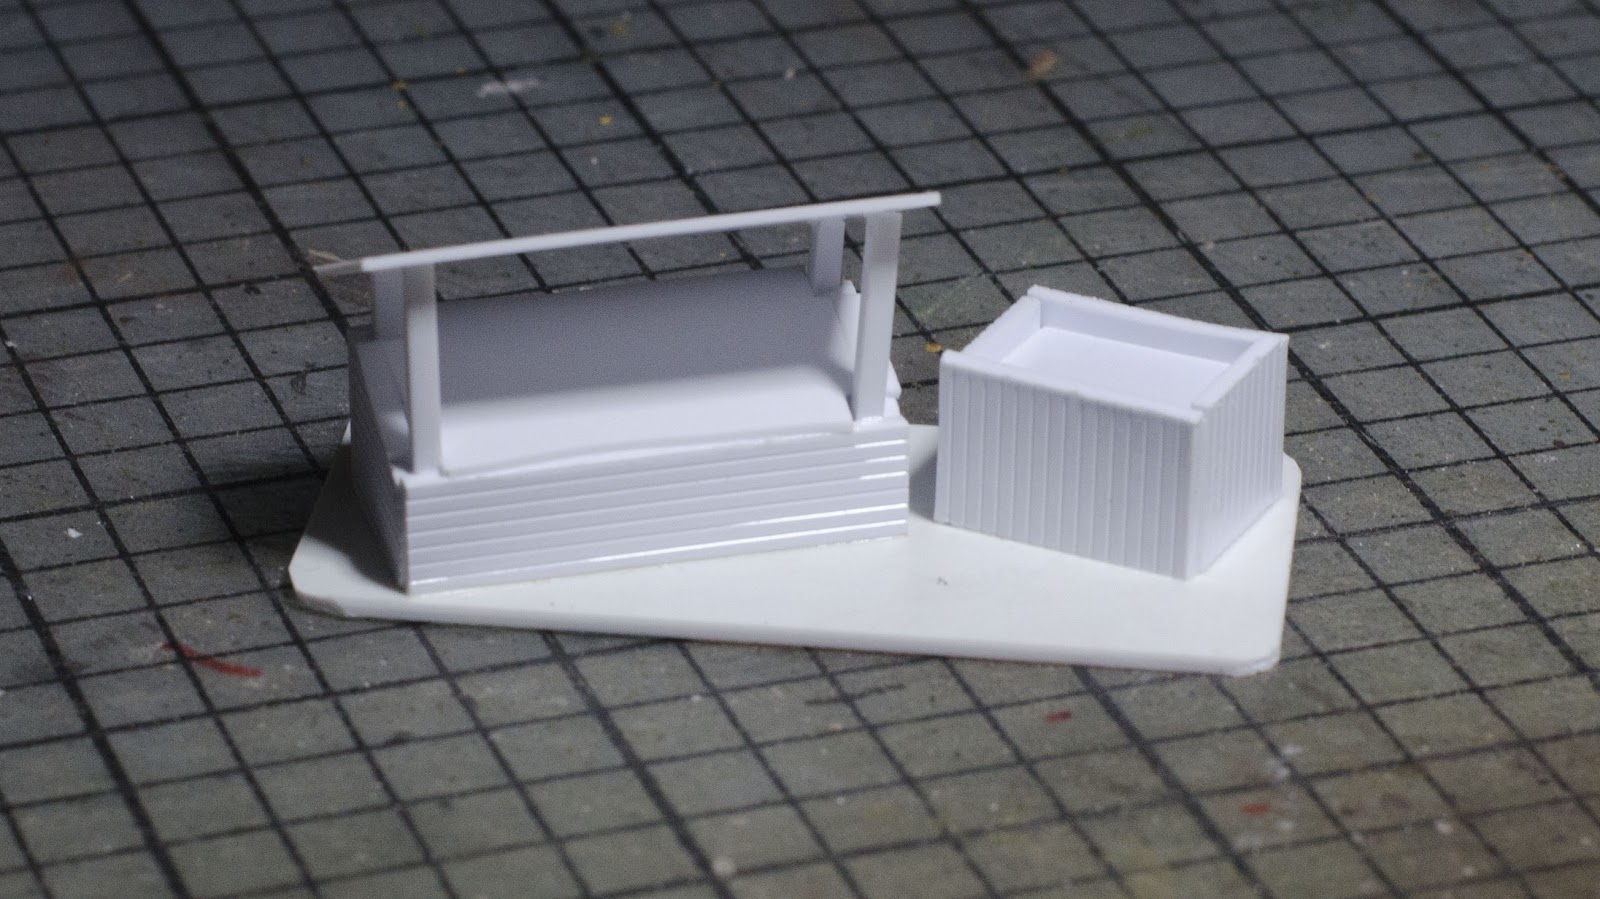
One of the scenarios in the Operation Enduring Freedom book for FoF takes place in and around an Afghan market. I spent the weekend in a cabin in the woods, and after hiking all day I was able to get in some hobby time building these guys. They are all scaled for my 15mm figures and made of styrene. I didn't build these to a plan, I just improvised with each one.

I built them for FoF, but, being Afghan stalls, they should suit for anything from Dark Ages forward. Which is convenient, what with my having just finished a bunch of Dark Ages figures.

These are all works in progress. Obviously they still need paint, but I'm going to load them up with wares for sale as well.


The whole set:

A produce stall and a bin:

Multiple bins:

Some rugs on the ground, with a tent to give some cover:

A rug merchant's stall (rugs still to come):

Not sure what's going to go here, but there will be wares hanging on that backboard, with more in the bins and on the table:

This one was a brainstorm: a barbecue stall! I'm going to add some gratings on top, and maybe some meat grilling:

A shelf, some carpets, and a table:

Tables:

Three produce stalls:

Friday, 10 August 2012

More troops for Afghanada

More additions to my Afghanada forces:

Taliban commanders
These figures are decent, though the guy in the front center was missing his AK barrel. I had to drill it and replace it with a piece of wire.

Taliban with AK-47s
These guys are the same package as I painted before, and the complaints about the posing and detail I had with the last bunch hold true for this bunch as well.

More Taliban with AK-47s

Same as above, rear view

Talib sniper teams

Canadians with under-slung grenade launchers


And finally, one of my new Gamecraft Miniatures laser-cut wood buildings.
I ordered 20 or so buildings, everything from tiny hovels to large-ish compounds and a mosque. This is the only one I have opened, and I think it looks great! It's simple, but I have to spackle the whole thing so any surface detail would be lost anyway. The fit is great and I think it will be really sturdy and durable once it's finished. Lots more photos of these to come, I think.