Sunday, 29 July 2012

A New Project: Afghanada

When you're wounded and left on Afghanistan's plains,
And the women come out to cut up what remains,
Jest roll to your rifle and blow out your brains
An' go to your Gawd like a soldier.


Well, it has been a long time since I posted anything. I've been working on a 1/35th scale Tiger, but I ran aground a bit and needed to wait for some new supplies, so I started in on another project that has been percolating for a while: my 15mm Moderns collection. The brass ring at the end of this project, if I have the time and the stamina, is to put together a campaign based on Afghanada, the outstanding CBC radio series about Canadians fighting in Afghanistan.

I have a huge load of Canadians and Taliban for Afghanistan scenarios, and I've been painting like a mad bastard. The miniatures I'm using are about 90% QRF and 10% Peter Pig. All of the figs in this post are QRF. I'm using USMC as Canadians, since they have essentially the same kit.

The QRF miniatures are... okay. They had the range of figures I want, so I'm happy with the selection I have, but some of the miniatures are a little questionable. One of the USMC/Canadian commanders has a large, silly bobble-head helmet, one of the Talib poses seems to have two elbows on his arm and another is holding his AK in a really awkward, strange position, and a lot of the miniatures have very muddy / non-existent faces. A high proportion of the gun barrels are either missing or so thin that they are going to snap off the first time someone mishandles them. All that said, they make for a nice force when they are all painted and viewed as a group.

At 15mm these problems aren't such a big deal, but still, I spend a lot of time on my minis, and it would be nice if I had a bit more to work with (or a bit less to work against).

Anyway, blah blah blah here's the pictures.

Canadian commanders / RTOs / medic:
These were the first of the moderns I painted. I tried to add in some brown dots on the uniforms to better replicate the CADPAT-AR camouflage worn by our guys in Afghanistan, but I don't think it worked out... I will probably paint over the khaki / tan parts of their uniforms to cover it up.


 Canadians with C7-ish rifles:


Canadians with C9-ish LMGs:


Taliban with AKs:


More Taliban with AKs:


Taliban with RPGs:


Taliban with RPKs:


I have enough painted minis now to play some games. All I need now is for my buildings to arrive from Gamecraft and my new battle mat to arrive from Zuzzy and to build some other terrain bits, and I'll be ready to go.

Sunday, 8 July 2012

Panzer R35s

I painted a couple of captured French tanks pressed into German service for this month's game at Trumpeter. They are resin tanks from Bolt Action, and they were super simple to assemble and paint:


I ran into the same problem I've had with several of the vehicles I've painted, namely overdoing it somewhat with the weathering powders, and then being unable to clean them off. The tanks look a bit better in these photos than they do in real life, where the camouflage is almost hidden beneath the dirt. 

TW&T at Trumpeter

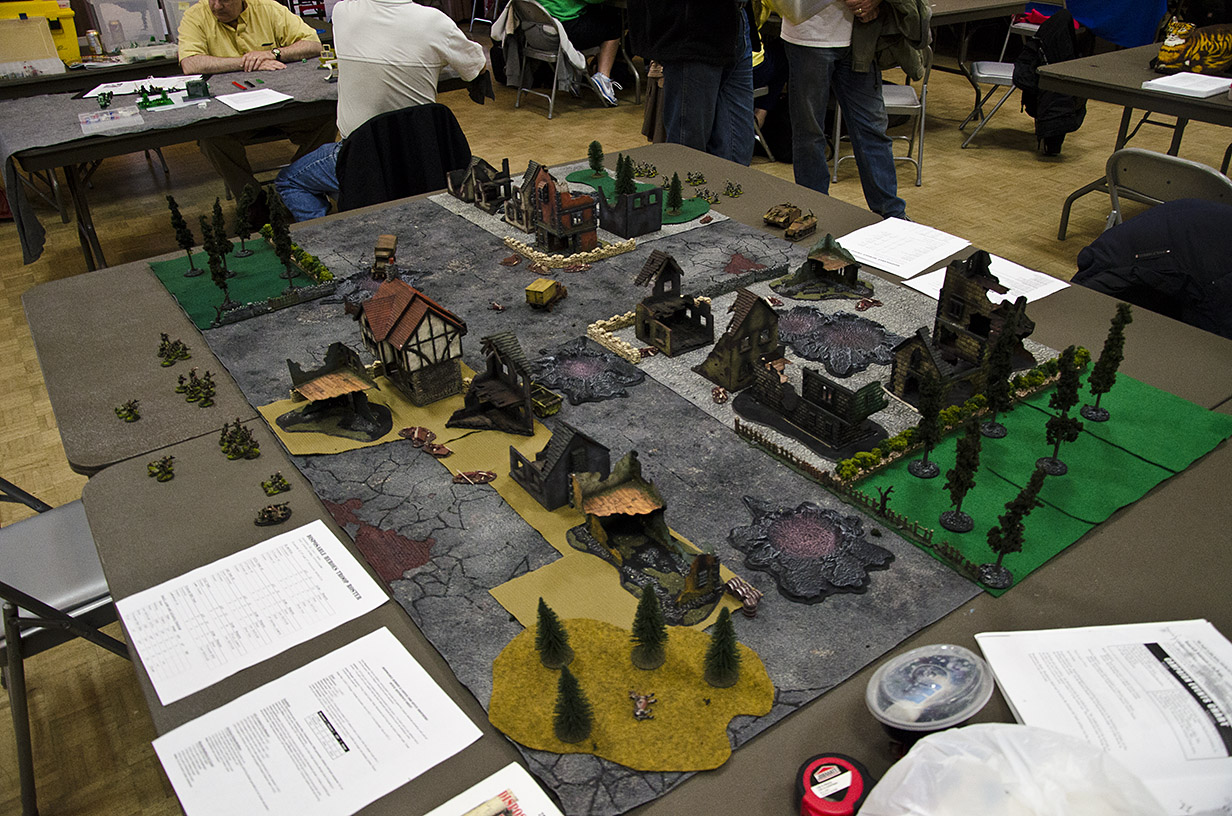
This month at the Trumpeter Society I hosted a game of Troops, Weapons and Tactics. We played a scenario from the Red Devils Of The Orne book from Skirmish Campaigns. It is the "sequel" to a scenario I hosted two months ago, also with TW&T as the rules. I find I'm becoming more comfortable with these rules as I play them more, and the more comfortable I become the more I enjoy them. The fog-of-war and command-and-control aspects are especially well done, and they make for an unpredictable, chaotic, and very fun set of rules. 

Anyway, on to the pictures:


A newly-arrived German squad advances into cover.


Two captured French tanks advance cautiously down the road towards the gatehouse.


These troopers apparently like the cover they have in this house, because I haven't been able to make them move from it!


A German halftrack with infantry gun in tow heads cross-country down the German left flank to cover the pillbox there.


Traffic jam in the village! One of the tanks got stuck in the alley as the German troops crossing the road were pinned down by mortar fire.


A view  from the German deployment area, over a tank and some troops, looking at the Para defenders in the gatehouse.


A German MG team sets up behind a fence to harass the enemy mortar.


The remains of the German HQ team jump over a hedge and close-assault a Canadian bren gunner, the only survivor of the Allied MG team that was rousted out of a house by tank fire.


A German MG team that tried to jump the hedge and close assault the Canadian mortar position, only to get caught in the open and suffer some murderous fire.


The Canadian HQ team, handing out the murderous fire.


The German tanks slowly advance towards the gatehouse. Moments after this photo was taken, one of the tanks was knocked out by the Paras, manning a captured Pak-40 anti-tank gun.


The game ended when we ran out of time at the end of the night, with the Paras still in control of the key building at their end of the table. This is a really fun scenario - things look very grim for the Paras at the start, as they are faced with an overwhelming number of the enemy, who has tanks and an infantry gun in support. However, they do have the advantage of elite status, more dummy blinds and good defensive positions, and thus the Germans are forced to move with some caution or risk getting mown down.

Edit:


By request, here are the photos again, this time in full colour:


Friday, 29 June 2012

Stronghold Terrain: Normandy Stable review

One bit of scenery that keeps cropping up in all of the scenarios I want to play from the Skirmish Campaigns book I'm working through is a Normandy-style barn. I had been looking for a while to find a model I liked, with no luck, and had essentially given up when a new kit from Stronghold Terrain popped up on The Miniatures Page. The photo looked decent, but the company is in Germany and I wasn't super keen on ordering something from that far away. Still, having a proper barn would be better than just using a random, not-at-all-barnlike building from my Mordheim box, so I went for it.

The kit arrived in 7 pieces: a base, 4 walls, and a 2-part roof. The base and walls are cast in what they call "hard stone plaster." It is a heavy, strong, almost cement-like material that feels like stone and is a bit porous, with really nice detail and no casting flaws that I could find. The roof is fairly thick and strong resin, with no casting flaws either. It is detailed on five sides, with the underside just smooth, but nobody is going to look at the underside anyway so who cares.

I should add that the stable arrived with a hand-written thank you note and a little baggie of barrels and crates for my "bitsbox." It was a really nice touch.

The stable assembled easily, though gluing the two pieces of the roof together at the correct angle took a bit of patience. The walls didn't quite fit perfectly... there's a small gap visible in the corner of the last photo. I don't know if that's a result of the model or my building skills, though.
I primed it with black spray paint and got to work with my regular craft acrylics:


I decided to experiment a bit and tried to get a gray, weathered effect out of the wall boards, rather than the usual brown that I usually paint wood. It felt wrong painting the wood gray, but after a couple of washes I think it turned out really well. There is a lot of detail on the walls, with cracked plaster, bricks, and even a little shrub molded in. The windows and doors are molded in, without actual apertures, but if I was really keen it wouldn't take much to drill / saw / file them out. For my purposes I'm happy to leave them as-is.

Likewise, there is no internal detail in the stable, but again I don't really care about that. It wouldn't take much to build individual stables out of coffee stir sticks if you needed that.

Overall, I am really happy with the Stronghold stable. Good detail, nice materials, a very robust-feeling final product, and great service.

Thursday, 14 June 2012

Space 1889

My game group decided to take a break from Dark Sun, and we are now playing a campaign of Space: 1889, with the Savage Worlds rules (which is probably my favourite RPG rule set). My character is an orphaned boy genius from Calcutta. I have two figures for him, one in his street clothes and one in his survival suit.


The be-robed boy figure is pretty vanilla, but I'm happy with the survival suit guy, especially the goggles. And I think the Martian red rock bases worked out pretty nicely as well.

Flames Of War - An Even More Half-Assed AAR

I had a game of FoW with my buddy last weekend. I had planned to photograph the game and write a report, but I got too busy machine-gunning Nazis and forgot to take pics. So, here are a few views of the battle, at the two points in the game when I remembered to shoot pics.

The scenario was Breakthrough, with me playing Canadian 4th Armoured and my friend playing an infantry company of the 2nd SS Panzer Division. These are all my minis and terrain.


SS deployed on the hill, guarding the objectives. PaKs on the right, a platoon of infantry behind a minefield in the midground, with Shermans of the Canadian 4th Armoured sort-of visible beyond.


A better view of the Shermans. On the hill behind them is the company 2iC, and on the hill behind him (just out of frame) is one of the OP Shermans.


SS PaKs. These guys were deployed to cover the objectives, but I was able to keep my tanks out of their LOS for the whole game, so they were pretty ineffective.


The other Sherman platoon advances across the draw towards the other SS infantry platoon and the Grilles. The one Canadian infantry platoon in my force sneaks along the edge of the board in Defrocked Priest Kangaroos.


One of the Grilles supporting the SS infantry. This one bogged the first time it tried to move and died without firing a shot. The other one got off a single round and burned a Sherman Firefly, but got killed by return fire.


Close to the end of the game. With things looking good on the far hill, the Sherman platoon that had been picking away at the SS behind the minefield decided that the SS infantry was pretty much irrelevant at this point and crossed through the village to engage a pair of 88s dug in on the far side (out of frame, unfortunately, because I think they are nice models!!)


Looking from the Canadians' board edge, we can see two burning Grilles, a burning Firefly, and not much SS Infantry... at this point, they had been mostly wiped out on this side. Meanwhile, my delayed-reserve Stuarts and Wasps were wreaking lumberjack havoc at the objectives, and the other Sherman platoon had wiped out the Luftwaffe-crewed 88s (super guns, but terrible crews) so the SS conceded. Chalk one up for the good guys!

Wednesday, 6 June 2012

Disposable Heroes Not-Really AAR

I hosted a game of Disposable Heroes at the last Trumpeter Society meeting on June 1. We played a scenario from Iron Ivan's scenario book on Market Garden.

The game went fairly well, but seemed to be largely decided by dice rolls. The Germans were also caught out in the open by a Para ambush, and a whole squad was wiped out... bad news for a force that only comprises two squads plus support!

Special thanks to Thomas Robson for helping me muddle my way through the rules. The rules are quite simple to use and seem like a good choice for club games, but I had a few quibbles. There is no provision for fog of war or command and control, which really eliminates any sense of reconnaissance or suspense. Aside from the single ambush, which is not dealt with especially elegantly in the rules, there is no suspense or surprise.

So, I'm still undecided whether DH or Troops, Weapons and Tactics are going to be my rules of choice. Or possibly some frankenrules stitched together with parts of both.

Anyway, on with the interesting part: the photos!


The calm before the storm: Paras may deploy in any building or wood on the board, and the Germans enter from the north street (the street at the end of which you see them parked, awaiting their turn)


Several turns in, and not a lot has happened. The Paras have laid a small smoke screen in the centre of the board, and the Germans have all advanced onto the board, but don't get far before they start trading fire with the Paras.


The Paras' Vickers MMG sprays lead at the Germans as they try to advance through the buildings on the East side of their entry street.


On the West side of the street, Germans occupy the buildings and make some cautious advances towards a British fire team in the South-West park.


The StuG only ever got this far onto the board, then spent the rest of its turns trying to get acquisition on the Paras' Vickers. It finally achieved acquisition, but to very little effect. I think I may have been using the wrong stats for the StuG, but it likely would have made very little difference to the game, considering how long it took to get its bearings, and that the deciding fights were happening elsewhere.


Massacre in the courtyard! The Paras' ambush team deployed in the building fuzzily visible on the right of the photo as the Germans tried to run across the open space of the courtyard, and absolutely reamed them, then moved on to the Germans' HMG, wiping them out as well.

By this time, the game was pretty much decided. A German team and a Para team destroyed each other in the West, but by this time it was pretty clear that the Germans would just be throwing their lives away if they continued pursuing the advance, and they withdrew.